Step 1: Configure Square in TrueBooker
- Log in to your WordPress Admin Dashboard.
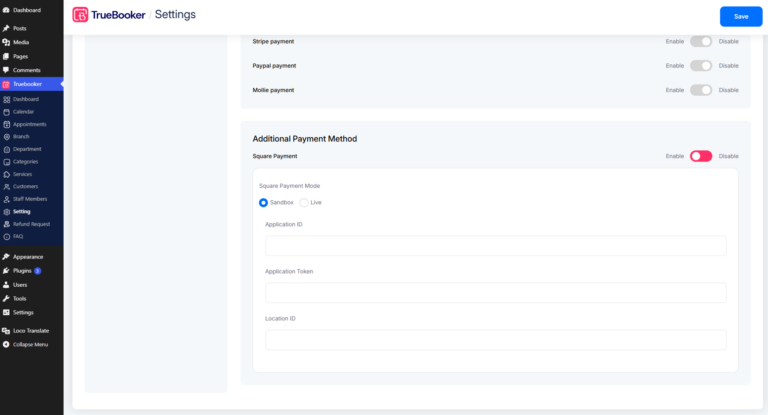
- Navigate to TrueBooker → Settings.
- Scroll down to the Square Payment section.
- Enable Square using the toggle switch.
- Select your preferred payment mode:
- Sandbox – For testing purposes.
- Live – For production transactions.
- Enter the following credentials from your Square Developer Dashboard:
- Application ID
- Application Token
- Location ID
- Click Save Changes to activate Square payments in TrueBooker.
Step 2: Customer Checkout Experience
Once Square is enabled, customers can select it as their payment method during the appointment booking process.
Selecting the Payment Method
- Review the booking details and cost breakdown, including
Subtotal, Tax, and
Total Amount Payable, under the
Confirm Details section. - Under Select Payment Method, choose
Square. - After selecting Square, a Square Payment button will appear.
Click the button to proceed to the secure checkout window.
Step 3: Square Secure Checkout
After clicking the Square Payment button, a secure Square payment window will open.
The checkout window includes integrated fields for secure credit and debit card payments.
Customers must enter the following billing information:
- Card Number
- Expiry Date (MM/YY)
- CVV
- ZIP / Postal Code
- Enter the required card and billing details.
- Click the Proceed button to submit the payment.
- Upon successful payment authorization, TrueBooker automatically processes the transaction and confirms the appointment booking.
- After the transaction is completed successfully, the customer is automatically redirected to the booking confirmation page.
Note: For testing payments, use Sandbox Mode. Switch to Live Mode only when you are ready to accept real customer payments.


