Getting Started with Truebooker
Setting up the Truebooker plugin is fast and user-friendly. Once the plugin is activated, you’ll need to configure a few important settings before you can start accepting appointments.
👉 First, go to:
Admin > Truebooker > Settings
From this page, you can manage everything — your company details, working hours, time slot, staff members, payment methods, holidays, and more — all from one place.
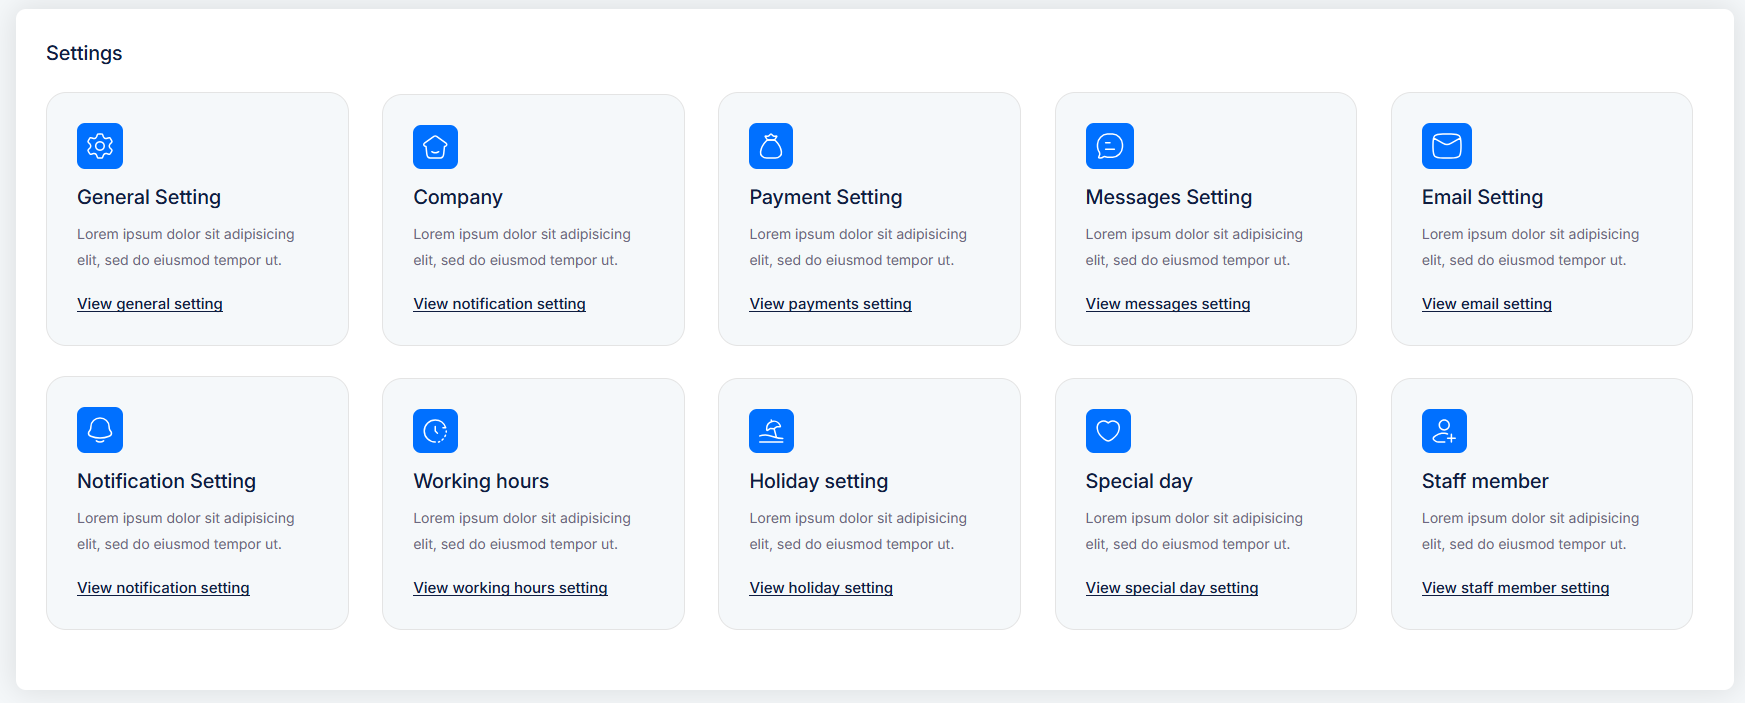
✅ Key settings to configure:
General Settings – Set timezone, currency, and global preferences
Company – Add your business details
Payment Settings – Set up supported payment methods
Messages & Email Settings – Customize auto-replies and notifications
Notification Settings – Configure how alerts are sent to users and staff
Working Hours – Define daily availability
Holiday & Special Days – Mark days off or custom breaks
Staff Members – Add your team for appointment assignment
Once done, your booking system will be ready to go live!
Step 1: Add a Category
Before you can assign services, you need to create one or more categories (e.g., Fitness, Medical, Consultation, etc.).
👉 Go to Admin > Truebooker > Categories
Here you can create categories that help organize your services.
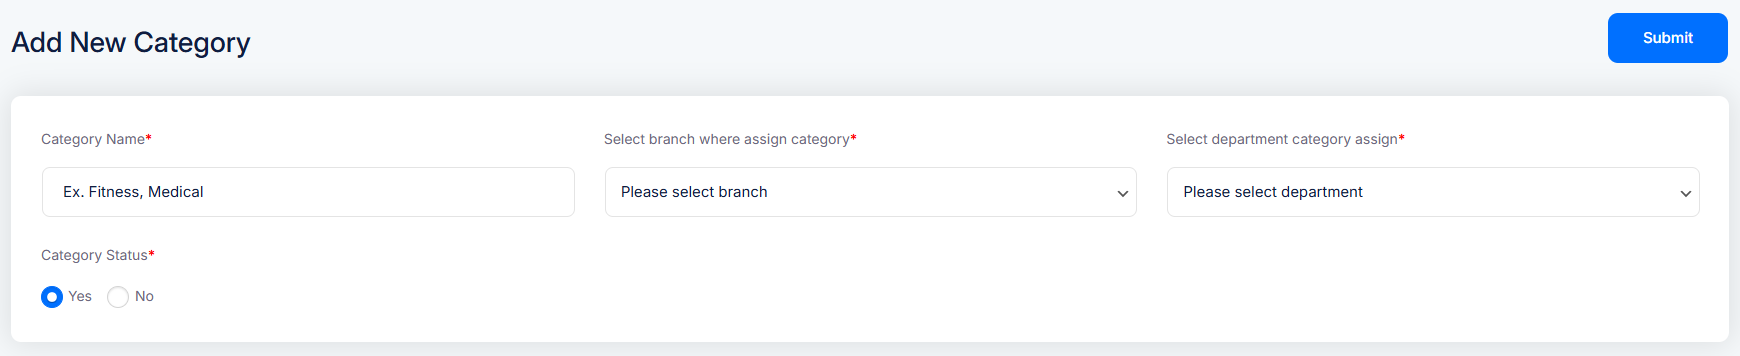
How to Add a Category:
- Enter the Category Name (e.g., Fitness, Medical)
- Set the Category Status to Yes to make it active
- Click the Submit button on the top right
These categories will help group services and make booking easier for your clients.
🔔 Note: If you have enabled Branches or Departments, make sure to select the appropriate options from the dropdowns. These fields will only appear when those modules are turned on.
Step 2: Adding the Service
Once categories are created, the next step is to add the services your business offers — like Consultation, Therapy Session, Yoga Class, etc.
👉 Navigate to: Admin > Truebooker > Services
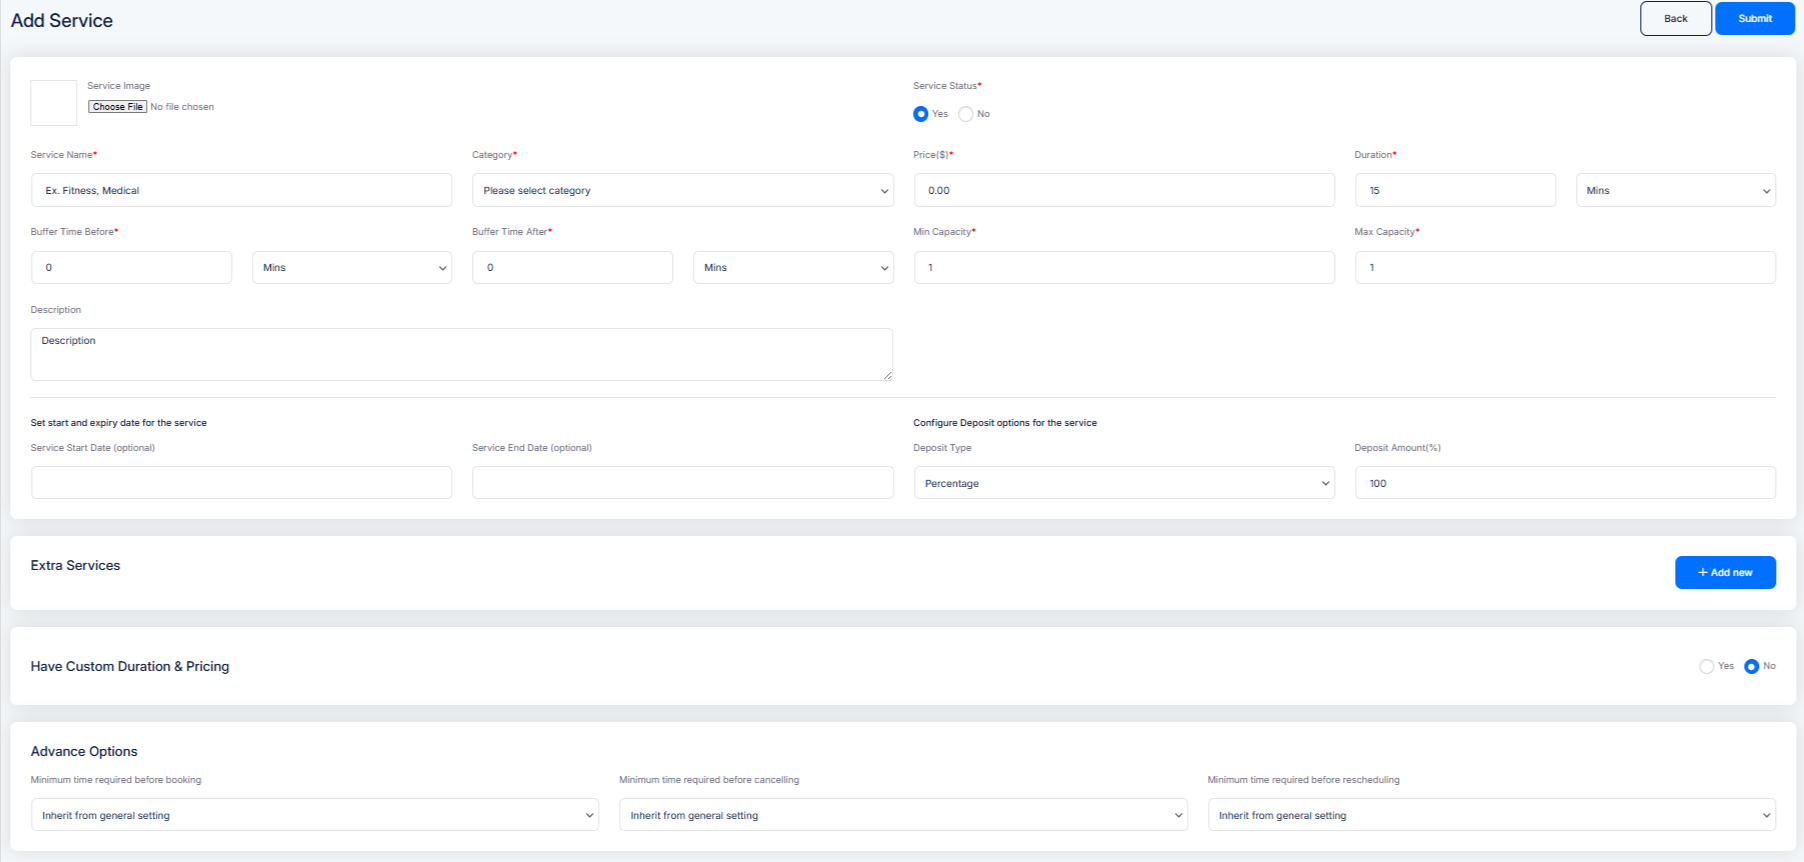
Fill out the following fields:
Service Image & Name – Add a relevant image and name to identify your service.
Category – Select the appropriate category for easy organization.
Price & Duration – Set the service cost and how long it will take.
Buffer Time – Add time before and after the appointment to avoid overlaps.
Capacity – Define the minimum and maximum number of participants.
Description – Write a brief overview of the service.
Start & End Dates (Optional) – Schedule when this service will be available.
Deposit Options – Choose deposit type and amount if applicable.
Extra Services & Custom Duration/Pricing – Enable if you offer add-ons or different time slots.
Advance Options – Set minimum notice for booking, cancellation, or rescheduling.
Once all details are filled in, click Submit to save your service.
Step 3: Add the Booking Form to Your Site
Now that your services, staff, and categories are ready — it’s time to display the booking form on your website so customers can start booking appointments.
👉 You can do this easily using a shortcode.
-
Go to Pages > Add New or edit an existing page
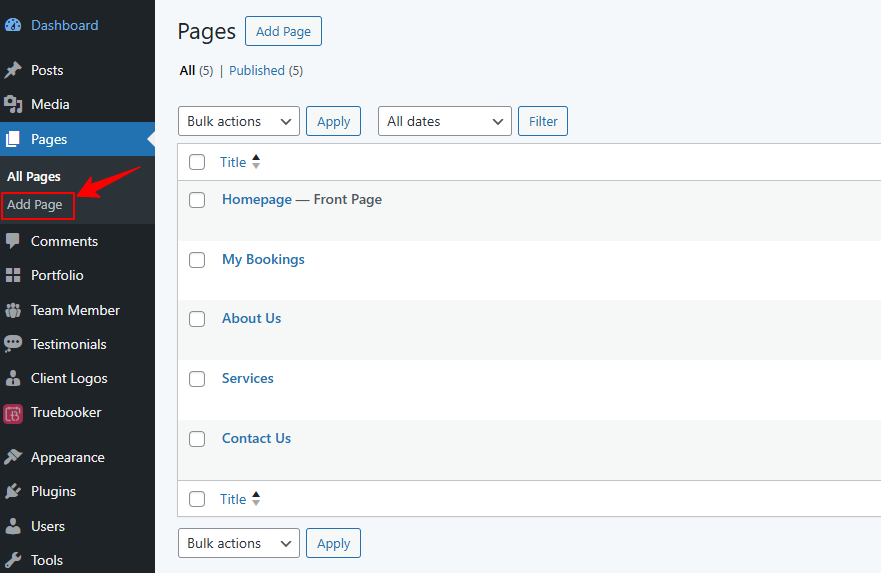
Add a title like Book an Appointment
Paste the following shortcode into the content editor:
[truebooker_booking_form]
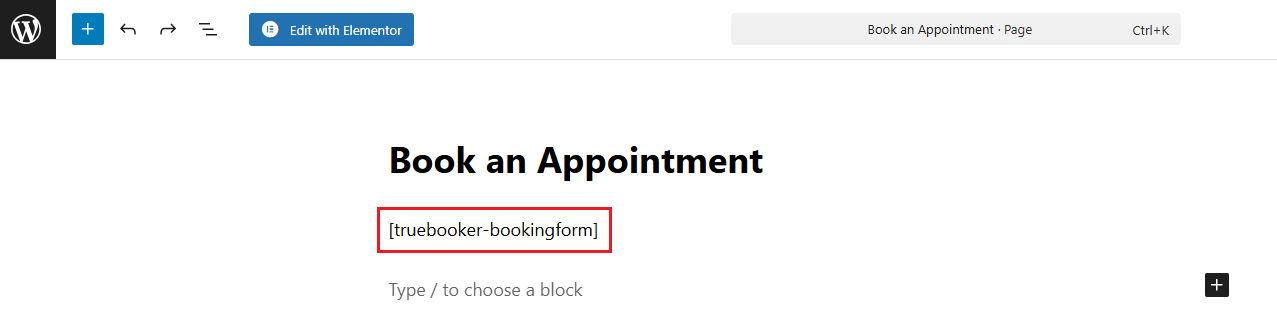
- Click Publish or Update the page
Once done, your booking form will be live and fully functional on the front end.
💡 Note: You can place the shortcode on any page, post, or widget area that supports shortcodes.
👉 Now visit the page where you added the shortcode.
You’ll see a fully functional booking form where users can:
📸 Example Preview:
You should see something similar to the screenshot below:
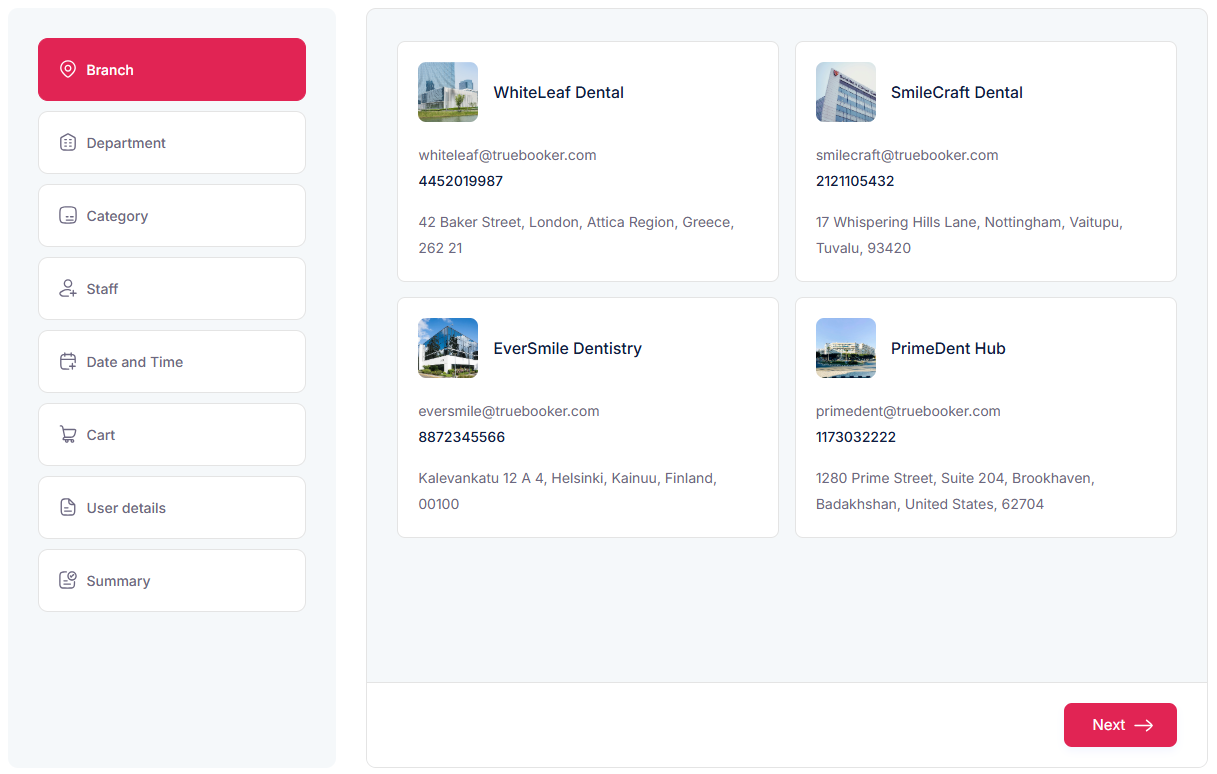
Once everything is set up, your customers can start booking appointments online!
Step 4: Managing Bookings
Once customers start submitting appointment requests through your booking form, you can manage all bookings directly from the WordPress admin area.
👉 Navigate to: Admin > Truebooker > Appointments
Here you’ll see a list of all submitted bookings with key details such as:
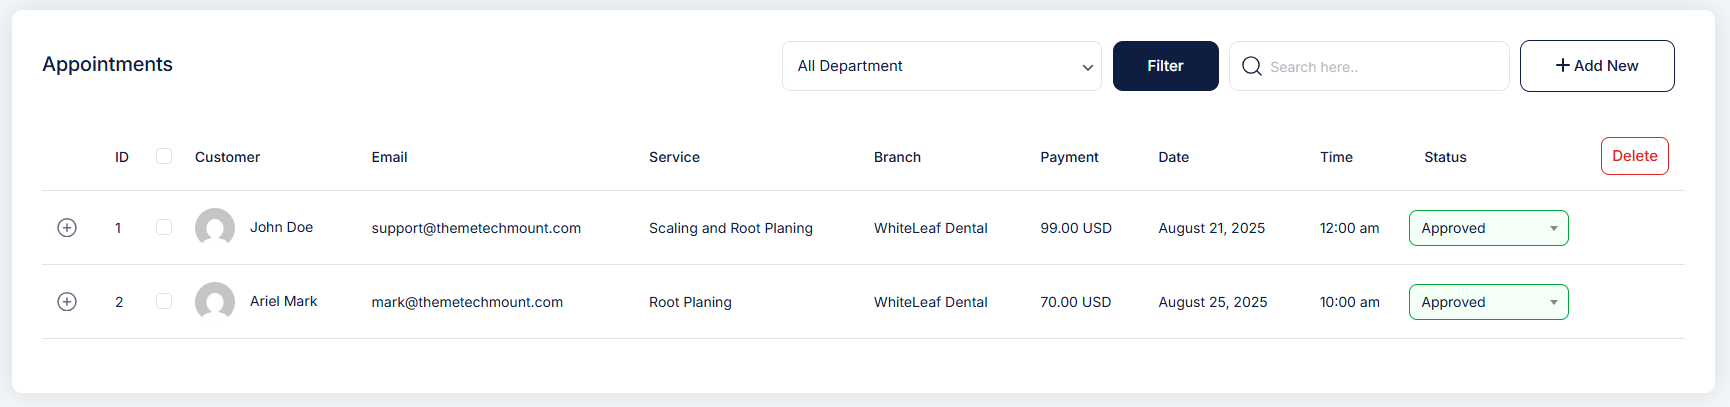
🔹 What You Can Do:
View Booking Details – Click on any appointment to see full info
Change Booking Status – Approve, Cancel, or Mark as Completed
Filter Bookings – Use filters to view by service, date, branch, or status
Delete Bookings – Remove old or test appointments if needed
📝 Note: Booking status and updates are synced with customer email notifications (if enabled in settings).


