Step 1: Configuration in TrueBooker Settings
- Log in to your WordPress Admin Dashboard.
- Navigate to TrueBooker → Settings from the left sidebar menu.
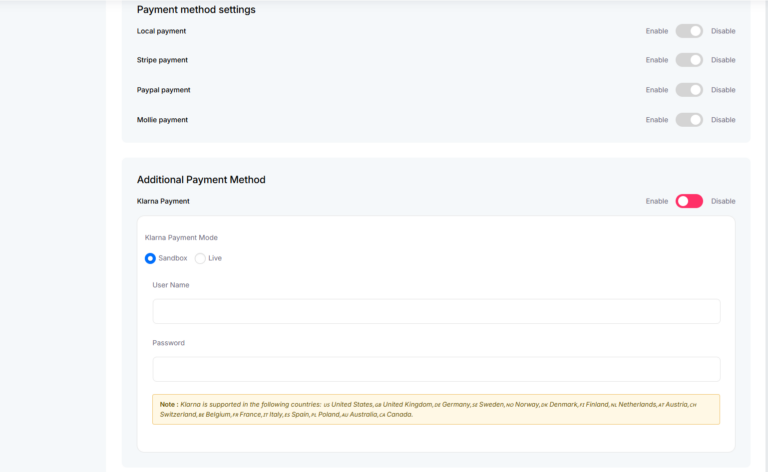
- Scroll down to the Additional Payment Method section.
- Locate Klarna Payment and switch the toggle button to Enable.
- Select your preferred Klarna Payment Mode:
- Sandbox (For testing purposes)
- Live (For production transactions)
- Enter the following API credentials obtained from your Klarna Merchant Portal:
- User Name
- Password
- Click the Save button at the top right to activate Klarna payments.
Note: Klarna is supported in selected regions including the United States, United Kingdom, Germany, Sweden, Norway, Denmark, Finland, Netherlands, Austria, Switzerland, Belgium, France, Italy, Spain, Poland, Australia, and Canada.
Step 2: Customer Checkout Experience
Once enabled, customers can choose Klarna seamlessly during the appointment booking flow.
Selecting the Payment Method
- The customer reviews their booking and cost breakdown under Confirm Details.
- Under the Select Payment Method section, select the Klarna radio option.
- After selecting the Klarna radio button, a Klarna Payment button will appear directly below it. Click this button to proceed.
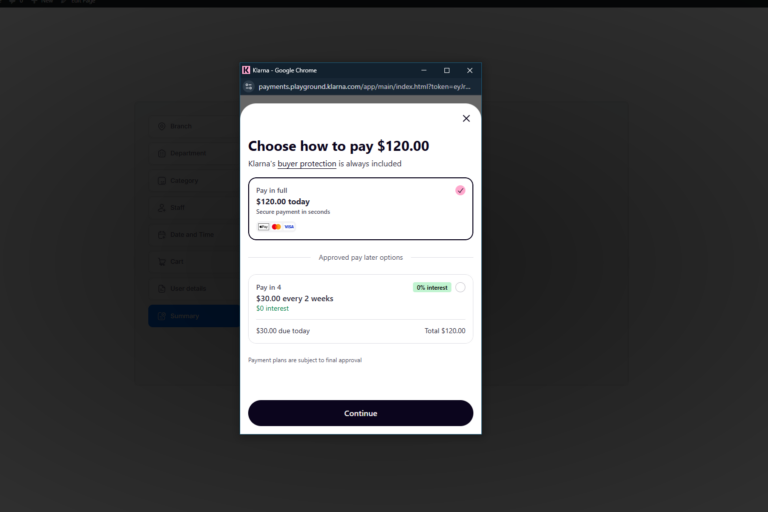
Step 3: Klarna Secure Checkout Portal
Clicking the Klarna Payment button opens a secure Klarna checkout window. The customer completes verification and payment. After successful payment, customers are redirected to Booking Confirmation page .