Appointment List View Management in TrueBooker
📍 Navigation Path: Go to Admin > Truebooker > Appointments
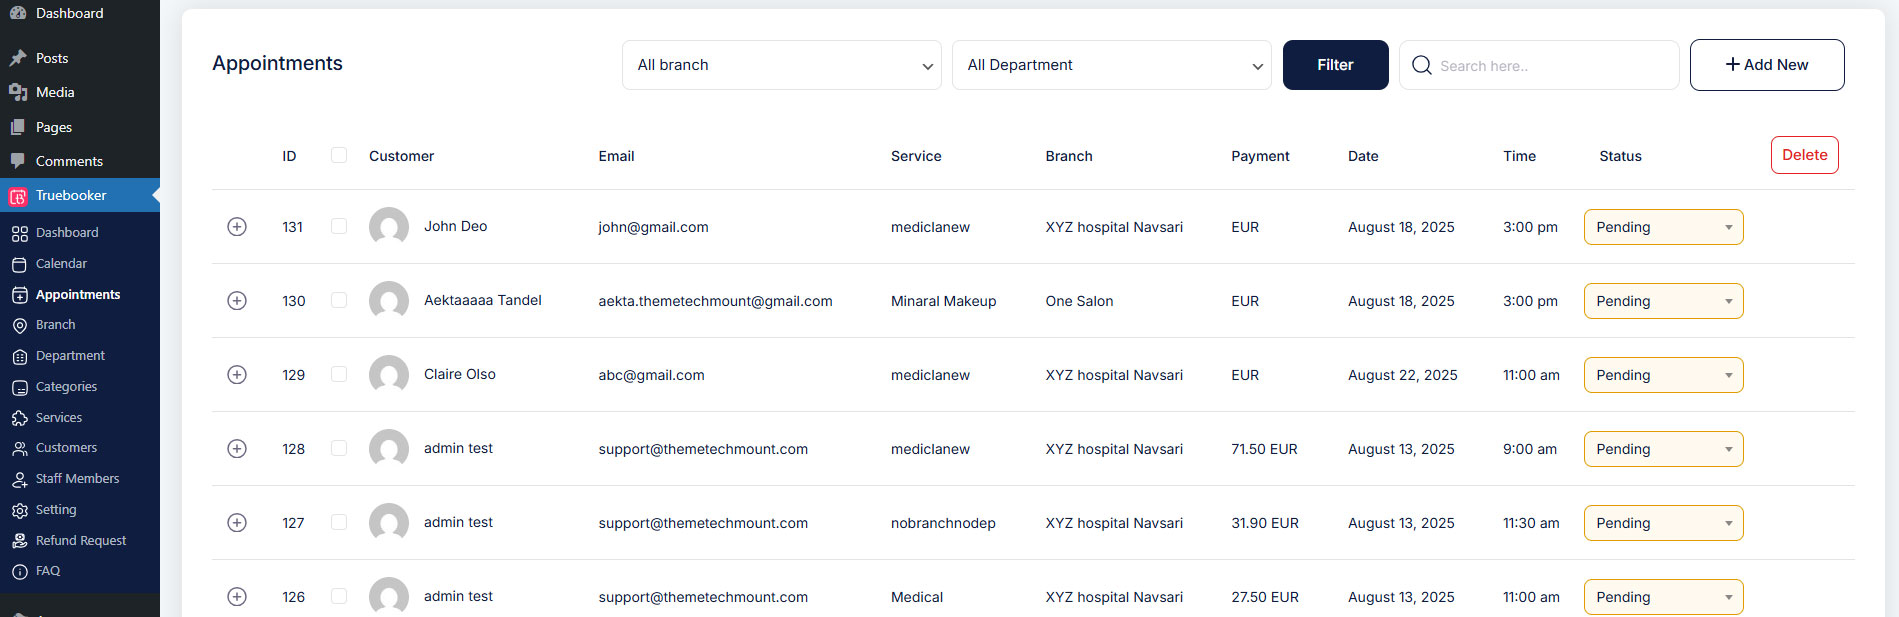
On this page, you’ll find a complete list of all your upcoming and past appointments, neatly organized for quick access.
Page Overview
From this screen, you can:
View every appointment in a clean, organized table.
Filter results by Branch and Department (only visible if enabled in Truebooker
> Settings > General Settings > Store Settings).Quickly search for a specific appointment using the Search bar.
Add new bookings instantly with the + Add New button.
You can easily control how many appointments appear on this page. Simply navigate to Truebooker > Settings > General Settings, adjust the “Default Items per Page” to your preferred limit, hit Save Changes, and you’re all set!
Key Table Columns
ID – Unique appointment identifier for quick reference.
Customer – Name of the person who booked the service.
Email – Direct contact information for the customer.
Service – The booked service name (e.g., Medical Consultation, Makeup Session).
Branch – Branch location (only displayed if enabled in Store Settings).
Department – Department name (only displayed if enabled in Store Settings).
Payment – Amount charged or payment status.
Date – The scheduled appointment date.
Time – The appointment start time.
Status – Current booking status (Pending, Approved, Cancelled, Completed).
(You can change the status directly from this dropdown without opening the booking details.)- Delete Button – Remove specific appointment.
Action Controls
Filter Button – Apply branch or department filters to narrow your view.
Search Bar – Instantly locate bookings by typing a name, email, or service.
+ Add New – Create a fresh appointment entry.
Delete Button – Remove selected appointments in bulk.


